Sunday, November 27, 2011

Raspberry Chocolate Chip Muffins

I was having trouble with the lighting in my house, so I decided to go outside for this picture. I'm convinced that I was getting strange looks from the people passing by. They all seemed to be staring at the plate of muffins, the camera, the weird-lookin' girl trying to photograph them in front of some dead flowers, and the dog trying to get at the muffins (my dog was on a leash, so he fortunately never did get at them). Anyways, they were really good! I would definitely make them again!!


Ingredients:
  • 1-2/3 cups all-purpose flour
  • 3/4 cup quick-cooking oats
  • 2/3 cup sugar
  • 2 teaspoons baking powder
  • 1 teaspoon baking soda
  • 1/4 teaspoon ground cinnamon
  • 1 egg, lightly beaten
  • 3/4 cup fat-free milk
  • 1/3 cup canola oil
  • 2 tablespoons orange juice
  • 1 teaspoon Spice Islands® pure vanilla extract
  • 3/4 cup fresh or frozen unsweetened raspberries
  • 1/2 cup miniature semisweet chocolate chips

Directions

  • In a large bowl, combine the first six ingredients. Combine the egg, milk, oil, orange juice and vanilla; stir into dry ingredients just until moistened. Fold in raspberries and chocolate chips.
  • Fill paper-lined muffin cups or cups coated with cooking spray two-thirds full. Bake at 375° for 20-25 minutes or until a toothpick comes out clean. Cool for 5 minutes before removing from pan to a wire rack.

Wednesday, October 19, 2011

{A guest post by Sophie}

I am super excited to have Sophie here today! She's a real awesome girl who has a really awesome blog, which you can find here:


Hey everyone! I'm Sophie from {La Creativite De La Fille}! And I am SUPER-DUPER happy
that "Book Blogger" gave me the chance to post over here! I'm just going to let you know
ahead of time, this IS my very first guest post {and I am super excited!} so I
don't know if there's any "normal" way to do it... But oh well!(;


A little bit about me and the {many} things I enjoy...
First of all, I love blogging! It gives me the opportunity
to share my creativeness with anyone who has the desire to read about it! In my spare time, I love baking, gettin' crafty, reading, journaling, running, and taking pictures.
Random Things I Love:
Anything pink, sparkly, or fluffy,
Hello Kitty
Justin Bieber
Paris
Diet Mountain Dew
Pigs
Southern accents
Down comforters
Muffins
Messy buns
Comfy pants
and whatever these {} things are called!


A little bit about my "bloggy-blog" {that's what I call my blog...}
"La Creativite De La Fille" is French for "The Girl's Creativeness"...
I love French stuff and I'm creative {so I'm told!} and that's the name I came up with!
I started my blog in April because my mom had a blog, and I loved the thought of being able
to design my own website and share all my ideas and things.
I have taught myself pretty much everything that I know about all that
shmancy-pants HTML codes, blog templates, signatures, and stuff like that.
Seeing a blog transform with things like that, gets me very excited!(:
On my blog, I share all my yummy recipes, baking experiences, crafty ideas,
and photography. So please stop by- I would love to have you as a follower!


But before I leave, I thought I should probably share with you a recipe! These cookies
are some of my absolute favorite and my specialty. They actually won 4th place at our local County Fair this summer... Enjoy!


White Chocolate Chip and Cranberry Cookies
Ingredients:
1/2 c. butter, softened
1/2 c. packed brown sugar
1/2 c. white sugar
1 egg
1 tablespoon brandy {I used vanilla}
1 1/2 c. all-purpose flour
1/2 tsp. baking soda
3/4 c. white chocolate chips
1 c. dried cranberries

Directions:
1. Preheat oven to 375ºF. Grease cookie sheets

2. In a large bowl, cream together the butter, brown sugar, and white sugar until smooth. Beat in the egg and brandy {vanilla}. Combine the flour and baking soda; stir into the sugar mixture. Mix in the white chocolate chips and cranberries. Drop by heaping spoonfuls onto prepared cookie sheets.

3. Bake for 8-10 minutes in the preheated oven. For best results. take them out while they are still doughy. Allow cookies to cool for 1 minute on the cookie sheets before transferring them to wire racks to cool completely.

Click HERE for a printable version of the recipe!


Alrighty! Well I think that just about sums it up!
Thanks so much for having me Book Blogger and I hope you all
enjoyed!
If you have any questions or comments, I would love to hear from you!
Thanks a bunch!(:

Sunday, October 16, 2011

Easy Sopapilla Pumpkin Cheesecake Bars {a guest post by Nela}

Thanks so much for doing this, Nela! I can't wait to try this recipe! And, for anyone who reads this, Nela's blog is
desiringgodsdesires.blogspot.com 

Ingredients: 
FOR THE BARS:
2 cans (8 Oz. Size) Crescent Roll Dough 
2 packages (8 Oz. Size) Cream Cheese, Softened 
1/2 cup + 2 TBSP of Sugar 
2 cups Pumpkin Puree 
2 teaspoons Vanilla Extract 
2 teaspoons Ground Cinnamon 
½ teaspoon Ginger 
½ teaspoon Nutmeg 
¼ teaspoon Allspice 
½ cups Butter, Melted 

FOR THE TOPPING: 
½ cup Sugar 
1 teaspoon Ground Cinnamon 
Honey (optional, For Serving)
Toasted Pecans (optional)


Preheat oven to 350ºF. Grease a glass 9×13 inch baking dish. Unroll one can of crescent roll dough (all in one piece) and...

lay it in the dish, pressing it out to cover the bottom and pinching any seams together. 

In a large mixing bowl, beat together the cream cheese and sugar... 

until light and fluffy. 

Add pumpkin, vanilla, cinnamon, ginger, nutmeg, and allspice, and beat to combine. 

Spread this mixture over the crescent roll dough in your pan. 

For the topping, in a small bowl, whisk together the sugar and cinnamon. 

Unroll the other can of crescent roll dough and lay it on top of the pumpkin cheesecake mixture. (I actually found it easier to lay it on some plastic wrap secured over a cutting board. This gave me a surface on which to pinch the seams closed and make it into one big rectangular sheet. I then used the plastic wrap to “flip” it carefully over onto the cheesecake mixture.) 

Pour melted butter over top of crescent roll dough 

and sprinkle the cinnamon and sugar topping evenly across the surface. 

Bake for 30 minutes or until golden brown. 

Let bars cool completely before covering them and placing them in the refrigerator to chill for at least a couple of hours (I left mine overnight). Cut into squares, heat for just about 20 seconds to take off the chill, and serve with a drizzle of honey and a sprinkle of toasted pecans.

Note: 
While the bars bake, you can also toast the pecans on another rack, just spread them out in a single layer on a baking sheet and toast for about 6 minutes or until fragrant, stirring about halfway through the cook time. Transfer nuts to a plate to cool.

Here's the Printable Recipe:
Easy Sopapilla Pumpkin Cheesecake Bars

Hope you enjoy! :)

Monday, October 10, 2011

Pumpkin Cake with Pumpkin Cream Cheese Frosting


My family had this cake for Thanksgiving dinner last night. All I can say is YUM! The pumpkin in the cream cheese was a nice touch.

Highly recommend. :)

Ingredients for cake:

Butter for coating cake pans, at room temperature
2 cups all-purpose flour, plus extra for dusting the pan
2 cups granulated sugar
2 teaspoons baking soda
2 teaspoons ground cinnamon
1 teaspoon kosher or sea salt
1/2 teaspoon freshly grated nutmeg
1/4 teaspoon ground cloves
3 large eggs, beaten
1 cup canola or vegetable oil
2 teaspoons pure vanilla extract
1 1/4 cups canned unsweetened pumpkin purée
1 cup lightly packed sweetened flaked coconut
3/4 cup canned crushed pineapple (do not drain)

For cream cheese frosting:

2 packages (8 ounces each) cream cheese, at room temperature
1 cup (2 sticks) unsalted butter, at room temperature
2 tablespoons canned unsweetened pumpkin purée
1 1/2 cups confectioners' sugar, sifted
1 teaspoon pure vanilla extract

To assemble:
Position a rack in the center of the oven and preheat to 350°F. Butter two 9-inch diameter cake pans with 1 1/2-inch sides. Line the bottom of each pan with a circle of parchment paper. Butter the parchment paper. Sprinkle the pans with flour, tap the pans to evenly distribute the flour, and then shake off the excess flour. Set aside.

To make the cake, in a large bowl, sift together the 2 cups flour, the granulated sugar, baking soda, cinnamon, salt, nutmeg, and cloves. In a medium bowl, combine the eggs, oil, and vanilla. In another medium bowl, combine the pumpkin purée, coconut, and crushed pineapple.

Add the egg mixture to the flour mixture and stir with a wooden spoon until just combined. Add the pumpkin mixture and stir just until combined. Divide the batter between the prepared pans, spreading it evenly. Bake for 35 to 40 minutes until a toothpick inserted into the center of a cake comes out clean. Transfer to wire racks and let cool in the pans for 15 minutes. Run a table knife around the edge of the pans to loosen the cakes. Invert the cakes onto the racks and peel off the parchment paper. Let cool completely before frosting the cakes.

To make the frosting, in the bowl of an electric mixer fitted with the paddle attachment, beat the cream cheese on medium speed for about 3 minutes until smooth. Add the butter and beat for about 2 minutes until combined. Add the pumpkin purée and beat until incorporated, about 1 minute. Add the confectioners’ sugar and vanilla and beat for about 3 minutes until fluffy.

Place 1 cake layer on a cake plate or platter. Using an offset spatula, spread half of the frosting over the top of the first cake layer. Spread the frosting right to the edge of the top without frosting the sides of the cake. Carefully place the second cake on top, lining up the edges. Spread the remaining frosting over the top of the cake without frosting the sides. Swirl the frosting to decorate the top. Refrigerate the cake to set the frosting. Remove from the refrigerator 30 to 40 minutes before serving.

Monday, August 29, 2011

Old-Fashioned Caramels


AMAZING! They have a lovely texture, and they're so creamy! I have tried candy recipes before, and none have worked as well as these! They are so much better than the ones in the store - the nuts in them are a nice touch (though they are optional, just in case you do not like nuts or are allergic).


Old-Fashioned Caramels
1 cup butter
2 1/4 cups firmly packed yellow sugar
1 cup corn syrup
14 oz. can sweetened condensed milk
1 teaspoon vanilla


In a heavy 3 quart saucepan, melt butter. Add sugar and mix until well blended. Stir in corn syrup; cook until sugar has dissolved; remove pan from heat. Stir in sweetened condensed milk; cook over medium heat, stirring constantly until mixture reaches the soft ball stage (240), about 20 to 30 minutes of constant stirring. Add vanilla. Pour hot mixture into buttered 9"by13" inch pan.
Cut caramels; wrap individually in waxed paper.
Optional: Add 2/3 of a cup of nuts at the same time you add the vanilla. I used walnuts, and they definitely added. I definitely recommend that you use them

Saturday, August 20, 2011

And the winner of my giveaway is........

I have finally drawn the winner!!! Thank you to all who entered, but I could only choose one. And the winner of the Mennonite Girls Can Cook cookbook (find more out about them HERE) is.................


Sophie!

Congratulations Sophie! Do you think you could leave your email address in a comment so I can get in touch with you about the giveaway via email? Thanks!

~Book blogger

Thursday, July 21, 2011

My first giveaway!

I'm going to do a giveaway!!!!!!! I'm sooooo excited! Thanks to Herald Press for providing me with a copy of this cookbook!

NOTE: if you don't comment on this post, I will assume you are not entered, even if you follow my blog already

Okay, so you're probably wondering what I'm giving away. And..... I'll tell you.

A copy of the MENNONITE GIRLS CAN COOK cookbook!!!!!!! You can check out their blog HERE. They're an amazing group of ladies who post a recipe every day!


Giveaway begins: As soon as I publish this post!
Giveaway ends: August 15, 2011
Winners announced: I make no promises, but hopefully on the 16 or 17 of August :)

A mandatory entry is to follow my blog. Here are some other things you can do:

Add the below button to your sidebar ~ worth one entry


You can follow one of my other blogs: livinglife4thelord.blogspot.com, booknook4you.blogspot.com, or exploringcreationwithzoology.blogspot.com. ~ worth one entry

Bake a recipe on my blog and tell me what you think about it, or tell me about a previous recipe you tried ~worth one entry

Bake something (it doesn't have to be from this blog) and give it to a friend, neighbor, or elderly person ~ worth three entries If you send me a picture of you with what you baked, I'll give you an extra entry

Post about this giveaway on your blog ~ worth one entry

Please leave a separate comment for each thing you do. If you follow my blog already then you are already entered once. But please leave a comment anyway! If you don't comment on this post, then you are not entered.

Monday, June 27, 2011

Southern Shortcake

In case you were wondering, that's basically a fancy name for strawberry shortcake. So, now you don't have to wonder.

Anyways, it's very yummy (I ♥whip cream) and very not good for you!!!!!! Though the shortcakes have no sugar in them. In fact, they have almost nothing in them except the key ingredients, such as flour, butter....


 Ingredients
  • 2 quarts fresh strawberries, sliced
  • 1/4 to 1/2 cup sugar
  • 1/2 cup shortening
  • 2-1/2 cups self-rising flour
  • 1 egg
  • 1 cup buttermilk
  • Whipped cream

Directions

  • Combine the strawberries and sugar; set aside. In a large bowl, cut shortening into flour until crumbly. In a small bowl, beat egg; add buttermilk. Stir into flour mixture just until moistened. Turn onto a lightly floured surface; knead three to four times. Roll out to 1/2-in. thickness; cut with a 3-in. round biscuit cutter. Place on a lightly greased baking sheet. Bake at 400° for 15-18 minutes or until lightly browned; cool slightly.
  • Split biscuits lengthwise; place the bottom halves on serving plates. Top with about 1/3 cup strawberries and whipped cream. Replace biscuit tops; spoon about 1/3 cup strawberries and more whipped cream on top. Serve immediately. Yield: 10-12 servings.
Note:  As a substitute for each cup of self-rising flour, place 1-1/2 teaspoons baking powder and 1/2 teaspoon salt in a measuring cup. Add all-purpose flour to measure 1 cup.

Saturday, June 25, 2011

Waffles

Sorry things have been so slow around here. I've been too busy to bake. :) Anyways, here's a recipes for waffles. I haven't had them for so long, since our waffle iron broke. Tonight was the first night in a long time! :)


Ingredients:

2 cups flour
2 tablespoons sugar
1 teaspoons salt
3 teaspoons baking powder
2 eggs, separated
1/4 cup melted shortening or oil
1 3/4 cups milk

Sift together first four ingredients. Set aside.

Beat egg whites until stiff, then beat yolks separately.

Combine shortening/oil and milk with egg yolks, and then stir into dry ingredients.

Fold in stiffly beaten egg whites last. Bake in hot waffle iron until lightly browned.

Yield: 10 to 12 waffles

Sunday, June 12, 2011

Life with a food blogger....

My brother showed me this picture. Isn't it so true?

I'm the one with the camera, the other person represents my whole family.

That's probably exactly how they feel when I show up to every meal with a camera. :)

Life with a food blogger

Sunday, June 5, 2011

Graham-Wiches

Here's a great, easy recipe to enjoy in the summer! (and in the winter too! that could get kind of cold though) Introducing... Graham-Wiches! So little effort goes into such a delicious snack!

The recipe originally called for whip cream, but pudding is cheaper. :)


All you have to do is make a package of instant pudding, any size is fine, but more pudding makes more sandwiches! :) Then you lay out graham crackers on a baking sheet and put a spoonful of pudding on each of them. Any kind is fine. I've tried chocolate, vanilla, pistachio, and cookies'n'cream pudding. They were all great! In the pictures I have cookies'n'cream.


Then you put another graham cracker on top, like a sandwich.


Freeze overnight.


Bon Appetit!

Thursday, June 2, 2011

Zwieback day...

If only you could smell the wonderful smell that I smelled today (say that three times fast!). Anyways, today was zwieback baking day! YUMMY! If you don't know zwieback is, then you are seriously missing out. Zwieback are white buns that are seriously good! You're probably thinking, "Oh, how wonderful. It's just a regular bun." (in case you didn't catch on, there was a little bit of sarcasm in that. Oh wait, you're the one thinking it!) But let me tell you, they are NOT! Don't even think it. (Does that paragraph make any sense? :)

If you haven't had zwieback, then you, my poor, zwieback deprived friend, have just got to start a batch this very moment.
We (my brother, my sister, and me) all stopped our school (we're homeschooled) and helped (our mom) shape the buns! They are so good!


This is not my pic. It's from an awesome blog called Mennonite Girls Can Cook. They post a recipe every single day - and they even have a cookbook!

Here's the recipe:

9 cups flour
1 cup butter
4 cups warmed milk
1/2 cup warm water
1 teaspoon sugar
2 tablespoons yeast (heaping)
1 tablespoon salt (heaping)
1 tablespoon lemon juice
1 cup flour (for kneading)

With a pastry blender, cut butter into 9 cups flour. Soften yeast in warm water (when using quick rising yeast, add directly to flour). Add salt to warm milk and mix yeast and milk into flour. Combine and let dough rest 15 to 20 minutes. Knead dough until smooth. Let rise to double. Form into balls and place on cookie sheets covered with parchment. Make the second ball smaller than the first and put them together (so there's a bottom and a top). Let rise to double. Bake in hot oven at 400F/200C for 20 minutes.

Sunday, May 29, 2011

Chocolate Chip Cookie Dough Cupcakes

When I make cookies, I'm always so sad to put that oh-so-yummy cookie dough into the oven and bake it. What's the point? The cookie dough is so good on its own! That's why I was so happy to find this delicious recipe for cookie dough cupcakes!!! You are going to love them!


Here are my frozen cookie dough balls.


Here's my frozen cookie dough stuck into the cupcake batter. The next step is baking them.


Here are my cupcakes, fresh out of the oven. See the cookie dough peeking out of the top?


Iced and sprinkled with chocolate chips....


The finished product. Doesn't that cookie dough in the middle look scrumptious?


For the cookie dough:
2 sticks softened butter (one stick is 1/4 of a cup)
3/4 cup sugar
3/4 cup brown sugar
4 tbsp milk
1 tbsp vanilla
2 1/2 cups all purpose flour
1/4 tsp. salt
1 cup mini chocolate chips

For the cupcakes:
3 sticks softened butter
1 1/2 cups light brown sugar, packed
4 large eggs
2 2/3 cups all purpose flour
1 tsp. baking powder
1 tsp. baking soda
1/4 tsp. salt
1 cup milk
2 tsp. vanilla extract

For the frosting:
3 sticks softened butter
3/4 cup light brown sugar, packed
3 1/2 cups powdered sugar
1/2 tsp. salt
2 tbsp. milk
1 tsp. vanilla extract

Directions:

To make the cookie dough, combine the butter and sugars in a mixing bowl and cream on medium-high speed until light and fluffy, about 2 mins. Beat in milk and vanilla until incorporated and smooth. Beat in the flour and salt until just combined. Stir in the chocolate chips. Using a 1.5 tbsp scoop, shape the dough into balls or tubes. Freeze on a parchment lined baking sheet overnight.

To make the cupcakes, preheat the oven to 350° F. Line two cupcake pans with paper liners (24 total). In the bowl of a stand mixer fitted with the paddle attachment, combine the butter and brown sugar. Beat together on medium-high speed until light and fluffy, about 3 minutes. Mix in the eggs one at a time, beating well after each addition and scraping down the sides of the bowl as needed.

Combine the flour, baking powder, baking soda, and salt in a medium bowl. Stir together to blend. Add the dry ingredients to the mixer bowl on low speed, alternating with the milk, beginning and ending with the dry ingredients, mixing each addition just until incorporated. Blend in the vanilla.

Using a 3 tbsp scoop, fill the prepared cupcake liners 2/3 full with the cupcake batter. Place a frozen cookie dough ball on the top center of each cupcake.

Bake at 350 for 16-18 mins.

To make the frosting, combine the butter and brown sugar in a mixing bowl and cream on medium-high speed until light and fluffy. Beat in the powdered sugar until smooth. Beat in the salt, milk, and vanilla extract until smooth and combined.

Frost the cupcakes and sprinkle with mini chocolate chips!

Makes 24 cupcakes.

Tuesday, May 24, 2011

Peanut Butter and Jam Muffins


I really liked these muffins! They had a very different texture and flavour from regular muffins, and the jam in the middle was such a nice surprise!

Ingredients:

1 cup whole wheat flour
3/4 cup white flour
1/2 cup brown sugar
3 teaspoons baking powder
1/2 teaspoon salt
1 1/4 cups milk, I used skim
1 egg
1/3 cup peanut butter
2 tablespoons butter, melted
1 teaspoon vanilla
Jam

Method:

In a bowl whisk together dry ingredients.

In another bowl mix the rest of the ingredients except for the jam and add to the dry ingredients and mix just until moistened.

Spoon half of the mixture into a greased muffin pan.

Spoon 1 teaspoon jam into each muffin cup and spoon the remaining batter over the jam to cover.

Bake at 400º for 25 minutes.

Cool a few minutes in the pan, remove and cool completely on a cooling rack.
These muffins freeze well.
Yields: 12 muffins

Sunday, May 22, 2011

Cinnamon Swirl Bread

This bread is sooooo good! I love how the swirl looks! It's basically a cinnamon bun, in bread form. It tastes good with butter, or icing, or by itself.


To make:
1/2 cup warm water
2 packages dry yeast
(1 tablespoon sugar)

Combine and stir until dissolved. Set aside. (Use 1 tablespoon of the sugar listed below.)

1 cup milk, scalded
1/2 cup shortening
1/2 cup sugar
2 teaspoons salt

Combine and stir until melted. Cool to lukewarm, then add to yeast mixture.

1 egg, slightly beaten
2/3 cup orange juice
2 cups flour

Add, beating until smooth. Let rest 10 minutes.

5 to 5 1/2 more flour.

Add and knead until smooth and elastic.

Grease top and place in greased bowl. Cover and let rise until doubled. Punch down. Divide dough into two balls. Let rest for 10 minutes. Roll each ball into a 7 by 15 rectangle, 1/2 inch thick.

1/2 cup brown sugar
1 tablespoon ground cinnamon

Mix.

2 tablespoons melted butter.

Spread over dough. Then sprinkle with brown sugar mixture (mentioned above).

Roll up rectangles jelly-roll fashion and place in 2 greased 9 by 5 loaf pans, sealed side down. Grease tops with oil or melted butter. Let rise until double again. Bake at 350 degrees for 35 to 40 minutes. Grease tops with butter while hot. (May omit orange juice and use additional milk instead.)

Yield: 2 loaves

Wednesday, May 18, 2011

The Cookie Fiasco: How To NOT Make Cookies

I'd like to say I made this mistake when I was still young and inexperienced in the baking world, but I actually made it just this afternoon.

I haven't made cookies for a very long time, so you can imagine how happy I was when I was allowed to make Marshmallow Filled Chocolate Cookies. I eagerly began the baking process, mixing together all the ingredients. I then proceeded to line the sheet with parchment paper. All good, right? WRONG! I unknowingly used wax paper instead of parchment paper. And, of course, I didn't know that until after the cookies were done baking.


Okay, that's not a real sign, but it should be! Then it would stop poor bakers like me from using wax paper.

Caution to all you bakers out there: Never, ever, ever use wax paper. If the wax paper bakes into the cookies, it could prove rather fatal to your health.

Next, I found out, AFTER I had already begun the marshmallow filling, that I didn't have enough butter to finish. That would have been good to know BEFORE I started the recipe. And if that wasn't enough, the oven started smoking because I had used wax paper instead of parchment paper and it was melting.

And THEN I pulled the cookies out of the oven, turned it off, and found out too late that they weren't cooked enough. My mom and I went through them, pulling each one apart, to see which were cooked enough to be eaten. Fortunately, exactly one half was cooked enough, the other half I'd rather not talk about.

This picture is of all the unbaked cookies, broken in half.


NOTE: IN THE END I MADE MARSHMALLOW ICING, I DIDN'T ACTUALLY FILL THE COOKIES. AND MY ICING WAS COMPLETELY MADE UP, BUT IT STILL TASTED ALRIGHT.
ANYWAYS, if you would like the recipe, here it is:

Marshmallow Filled Chocolate Cookies


2 cups sugar
1 cup softened butter or margarine
2 teaspoons vanilla
2 eggs
2 cups milk
4 cups flour
2/3 cup unsweetened cocoa
3 teaspoons baking soda
1 teaspoon baking powder
1 teaspoon salt

Preheat oven to 375 º
Line cookie sheets with parchment paper or grease.
In mixer bowl, beat together, margarine, sugar vanilla and eggs. Beat until light. Add milk.
Add dry ingredients and mix well. This is a soft dough, more like a thick cake batter.
Using a scoop or teaspoon, drop dough about 2 inches apart onto prepared cookie sheets.
Bake at 375º for 7 - 9 minutes, baking until cookies are soft but spring back when touched.
Wait a minute or two before removing from cookie sheets to a rack. Cool completely.
Fill with marshmallow filling and store in tightly covered containers in your freezer.

Marshmallow Filling

1 1/2 cups mini marshmallows
6 Tablespoons milk, divided
3 cups icing sugar
1/3 cup softened butter or margarine
1/3 cup shortening
1 1/2 teaspoons vanilla

Place mini marshmallows and 3 tablespoons of milk in a microwave bowl or saucepan.
Gently melt, over medium heat - stirring frequently.
Just before marshmallows have melted completely, remove from heat and stir until all the lumps are gone. Set aside.
In mixing bowl, beat together margarine, shortening and vanilla.
Add icing sugar and 3 tablespoons milk, beating well.
Add marshmallow mixture and continue to beat. You may need a bit more icing sugar or milk to make it of spreading consistency. It should be thick but still spreadable.
Fill cookies.
Enjoy!

Oh well, in the end it all worked out. And the cookies still tasted good!

Bon Appetit!

Monday, May 9, 2011

Coconut Clouds

Coconut Clouds R


  • 67 Servings
  • Prep: 45 min. Bake: 10 min./batch + cooling
45 10 55

Ingredients

  • 1/4 cup butter, softened
  • 1/4 cup shortening
  • 1 cup sugar
  • 1/2 cup packed brown sugar
  • 2 eggs
  • 1 teaspoon coconut extract
  • 1 teaspoon vanilla extract
  • 1 cup (8 ounces) sour cream
  • 2-3/4 cups all-purpose flour
  • 1 teaspoon salt
  • 1/2 teaspoon baking soda
  • 1 cup flaked coconut, toasted

  • FROSTING:
  • 1/3 cup butter, cubed
  • 3 cups confectioners' sugar
  • 3 tablespoons evaporated milk
  • 1 teaspoon coconut extract
  • 1 teaspoon vanilla extract
  • 2 cups flaked coconut, toasted

Directions

  • In a large bowl, cream the butter, shortening and sugars until light and fluffy. Beat in eggs and extracts. Stir in sour cream. Combine the flour, salt and baking soda; gradually add to creamed mixture and mix well. Fold in coconut.
  • Drop by tablespoonfuls 2 in. apart onto lightly greased baking sheets. Bake at 375° for 8-10 minutes or until set. Remove to wire racks to cool.
  • In a small heavy saucepan, cook butter over medium heat for 5-7 minutes or until golden brown. Pour into a small bowl; beat in the confectioners’ sugar, milk and extracts.
  • Frost cookies; dip in coconut. Let stand until completely dry. Store in an airtight container. Yield: about 5-1/2 dozen.

Wednesday, May 4, 2011

Contest Winners!!!!

Well, here are the contest winners to my food photography contest!

First off, I will talk about each picture...

Nela's picture of Cinnamon Buns:

I really liked this picture! You can clearly see the glaze and swirls, and the close up is perfect! If you get too close it will sometimes get blurry if you are not careful.

Amy's picture of Pavlova:

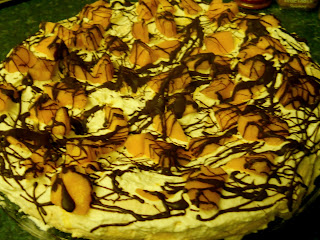
Love this picture! It's slightly blurry, but I kind of like that. It gives it a nice look. I love how the chocolate is dribbled on top... it makes my mouth water.

Savories of Life's picture Meat Pie:


Great picture! I like how you had the other plate just barely in the picture and centered the main plate. The food looks delicious and the picture has lots of colour! I'll have to try and make it some time!

And now, for the winners... *drum roll please*

First place goes to NELA @ "Beloved Star." Be sure to check out her blog. It's awesome! Here's the address: desiringgodsdesires.blogspot.com

And here's the medal! Thanks for participating!

First place!


Honourable Mention goes to:

AMY THOMSON @ Amy's Prayer Blog. Be sure to take a look at her blog! The address: amysprayerblog.blogspot.com

And here's the medal!

Honourable Mention